
Integrating 3D Illustrations from IconScout into Spline
Follow the steps to download, import, and export 3D models to Spline and customize them.
As kids, we played with clay, molding and shaping it into various forms, sparking our imagination. This early fascination with creating 3D objects has evolved alongside us into the world of 3D technology.
3D technology is transforming numerous industries. With advancements in tools like Blender, Spline, and IconScout, 3D design has become more accessible than ever. Beyond gaming, websites, apps, and movies, we now see 3D-printed objects bridging the gap between digital concepts and physical reality.
In this guide, we'll show you how to utilize pre-existing 3D illustrations or models from IconScout, import them into Spline, and turn them into engaging animations.
Downloading your 3D illustration from IconScout
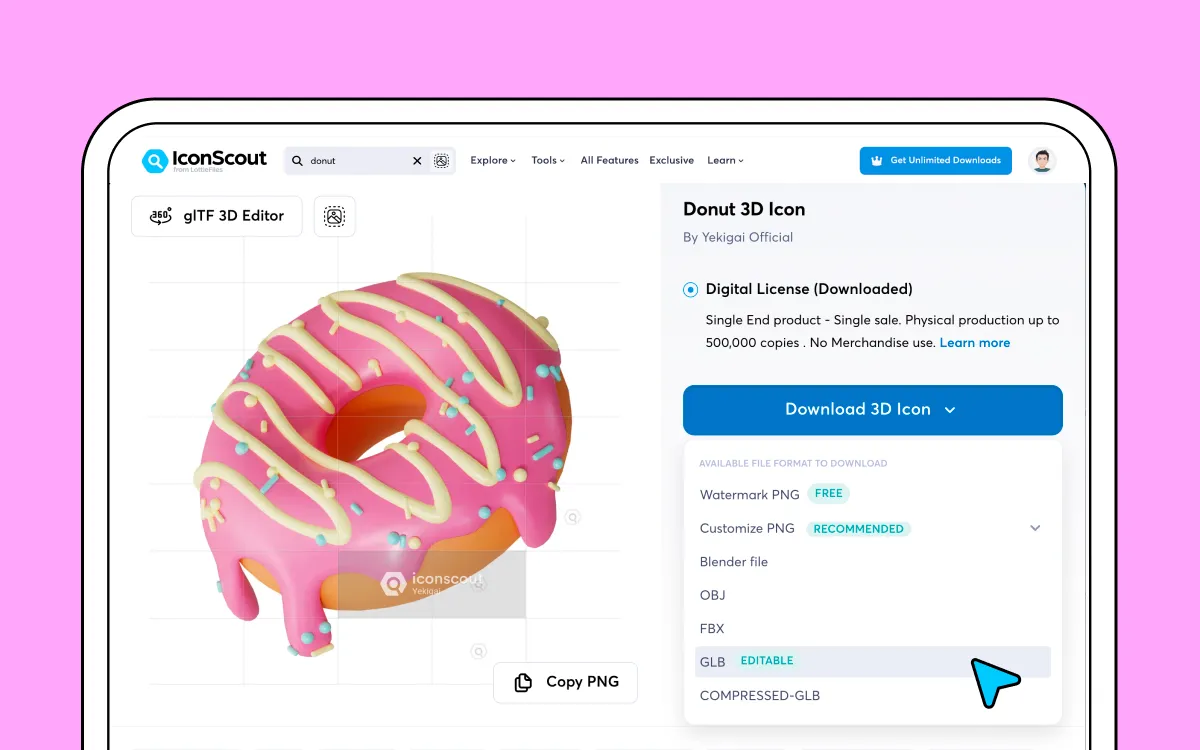
- Search from thousands of free and premium 3D illustrations on IconScout.
- Once you find something you like, just click on the asset thumbnail (to follow this tutorial, you can use this 3D donut illustration).
- Click Download 3D Illustration, you can download in any of Spline support formats which are GLTF/GLB, STL, FBX and OBJ a
- For the purpose of this tutorial, we will download it as a OBJ file
Import 3D illustration to Spline
- If you don’t already have it installed, download and install the latest version of Spline or you can use their web-based application and start right away.
- You can access the import options from multiple points of Spline UI, you can
- Enter from main menu: next to the search bar
- Sidebar bottom area of your project
- From the hamburger ☰ menu, select Open / Import
- Alternatively, you can drag and drop compatible file types to the viewport.
- From here, select the file format you would like to open, in this case 3D and open the file that was saved earlier on your device.
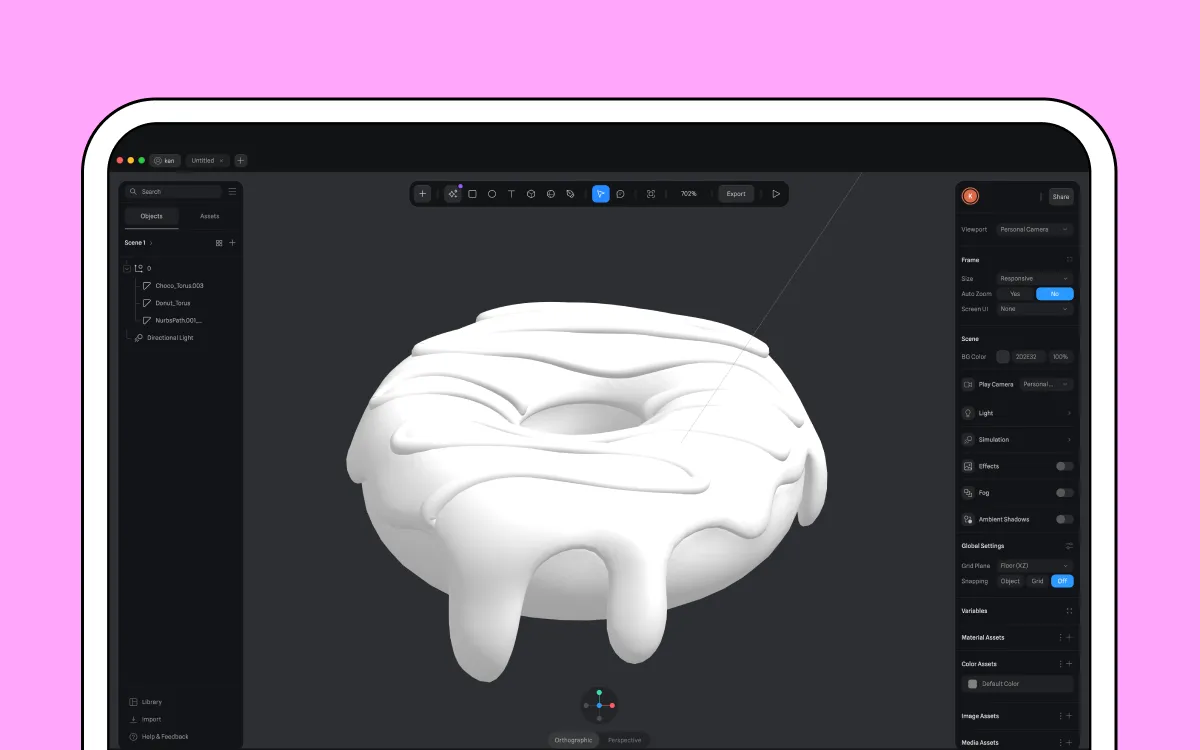
When you enter Spline, you will see the Viewport, a window that shows everything in your Spline project.
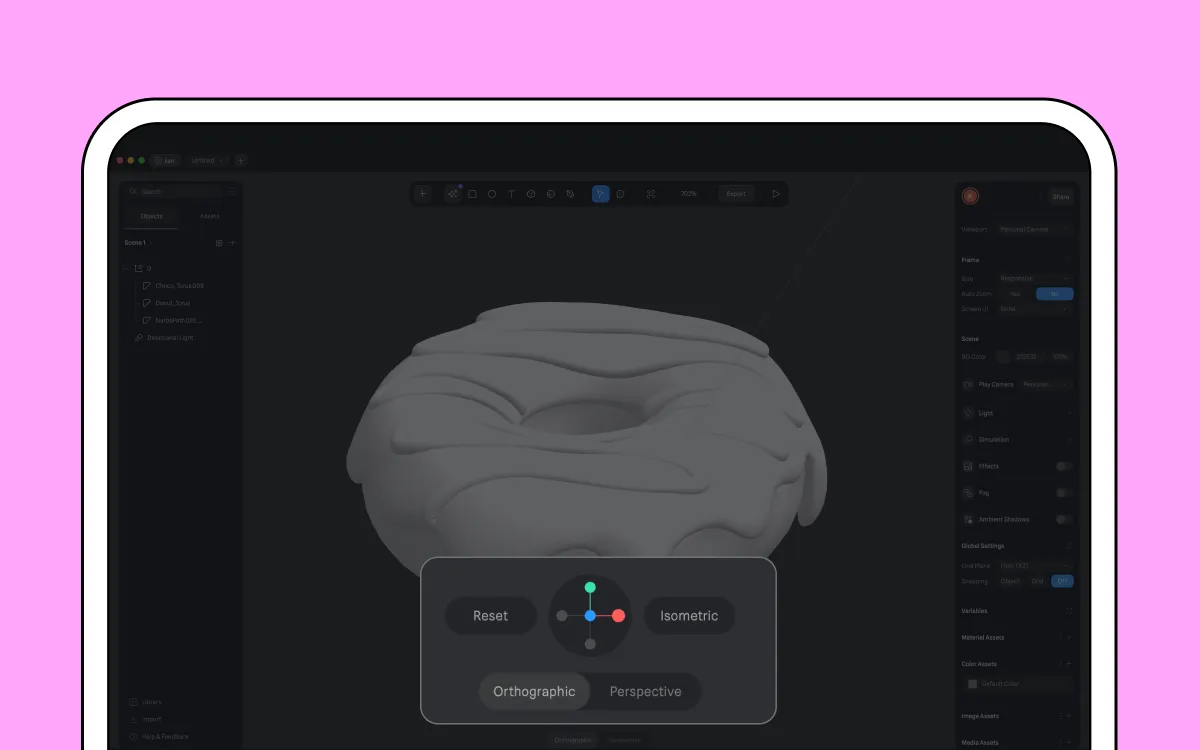
You can move around by using the navigation buttons on the bottom of the screen to control your Spline’s camera viewpoint:
- To navigate between views, press the axis points.
- Hower over it will enable you to find a quick button to reset the view of your scene or go into an Isometric view.
- You can also change to two different camera views, whether it is Orthographic (all angles are parallel) or Perspective (All angles change based on the distance from the camera to the object)
Customize your 3D model
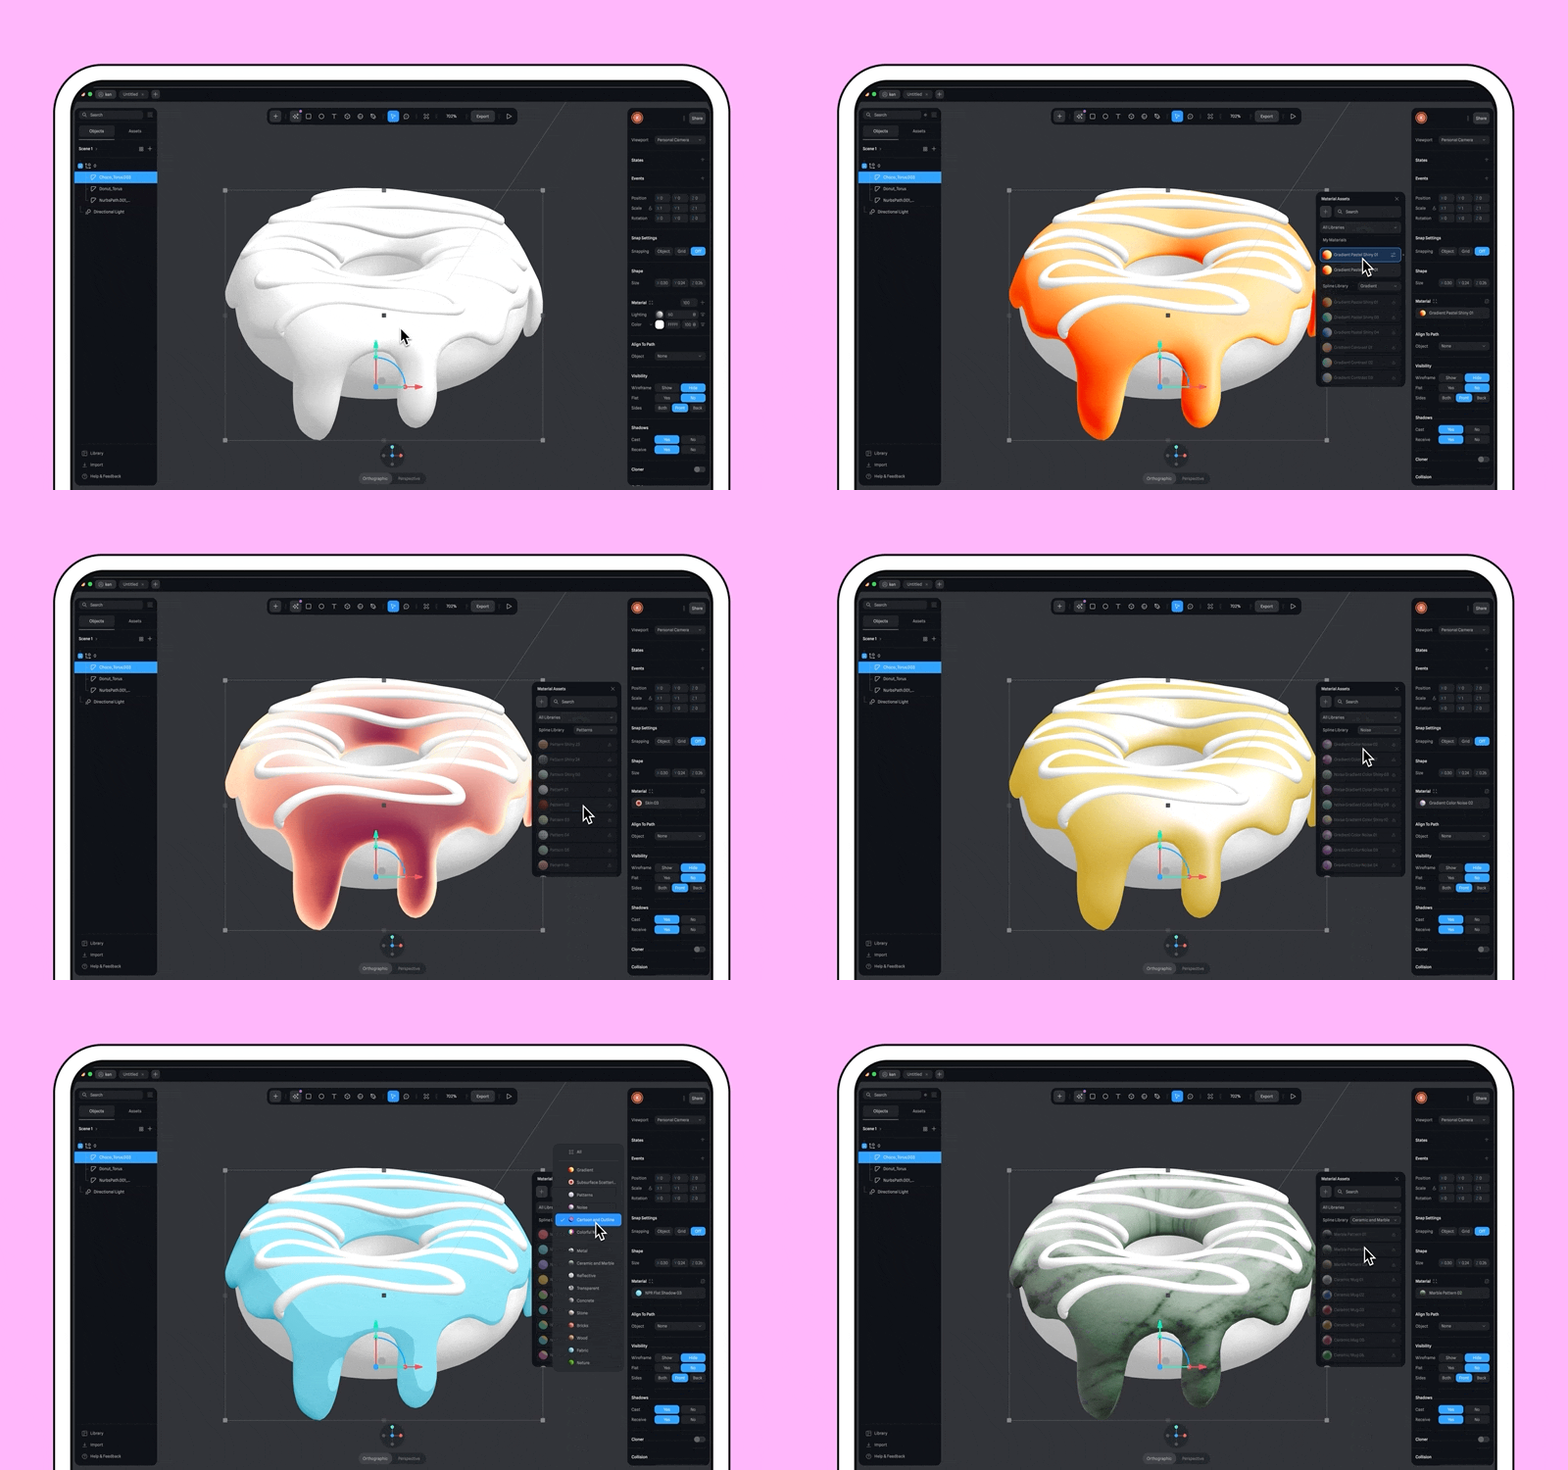
We’re finally ready to change the overall feel of the donut and give it the colors and textures it needs
- On the right panel go to Material
- If you would like you can use the existing Material library that Splines (there are limited free options based on the subscription package you're are on).
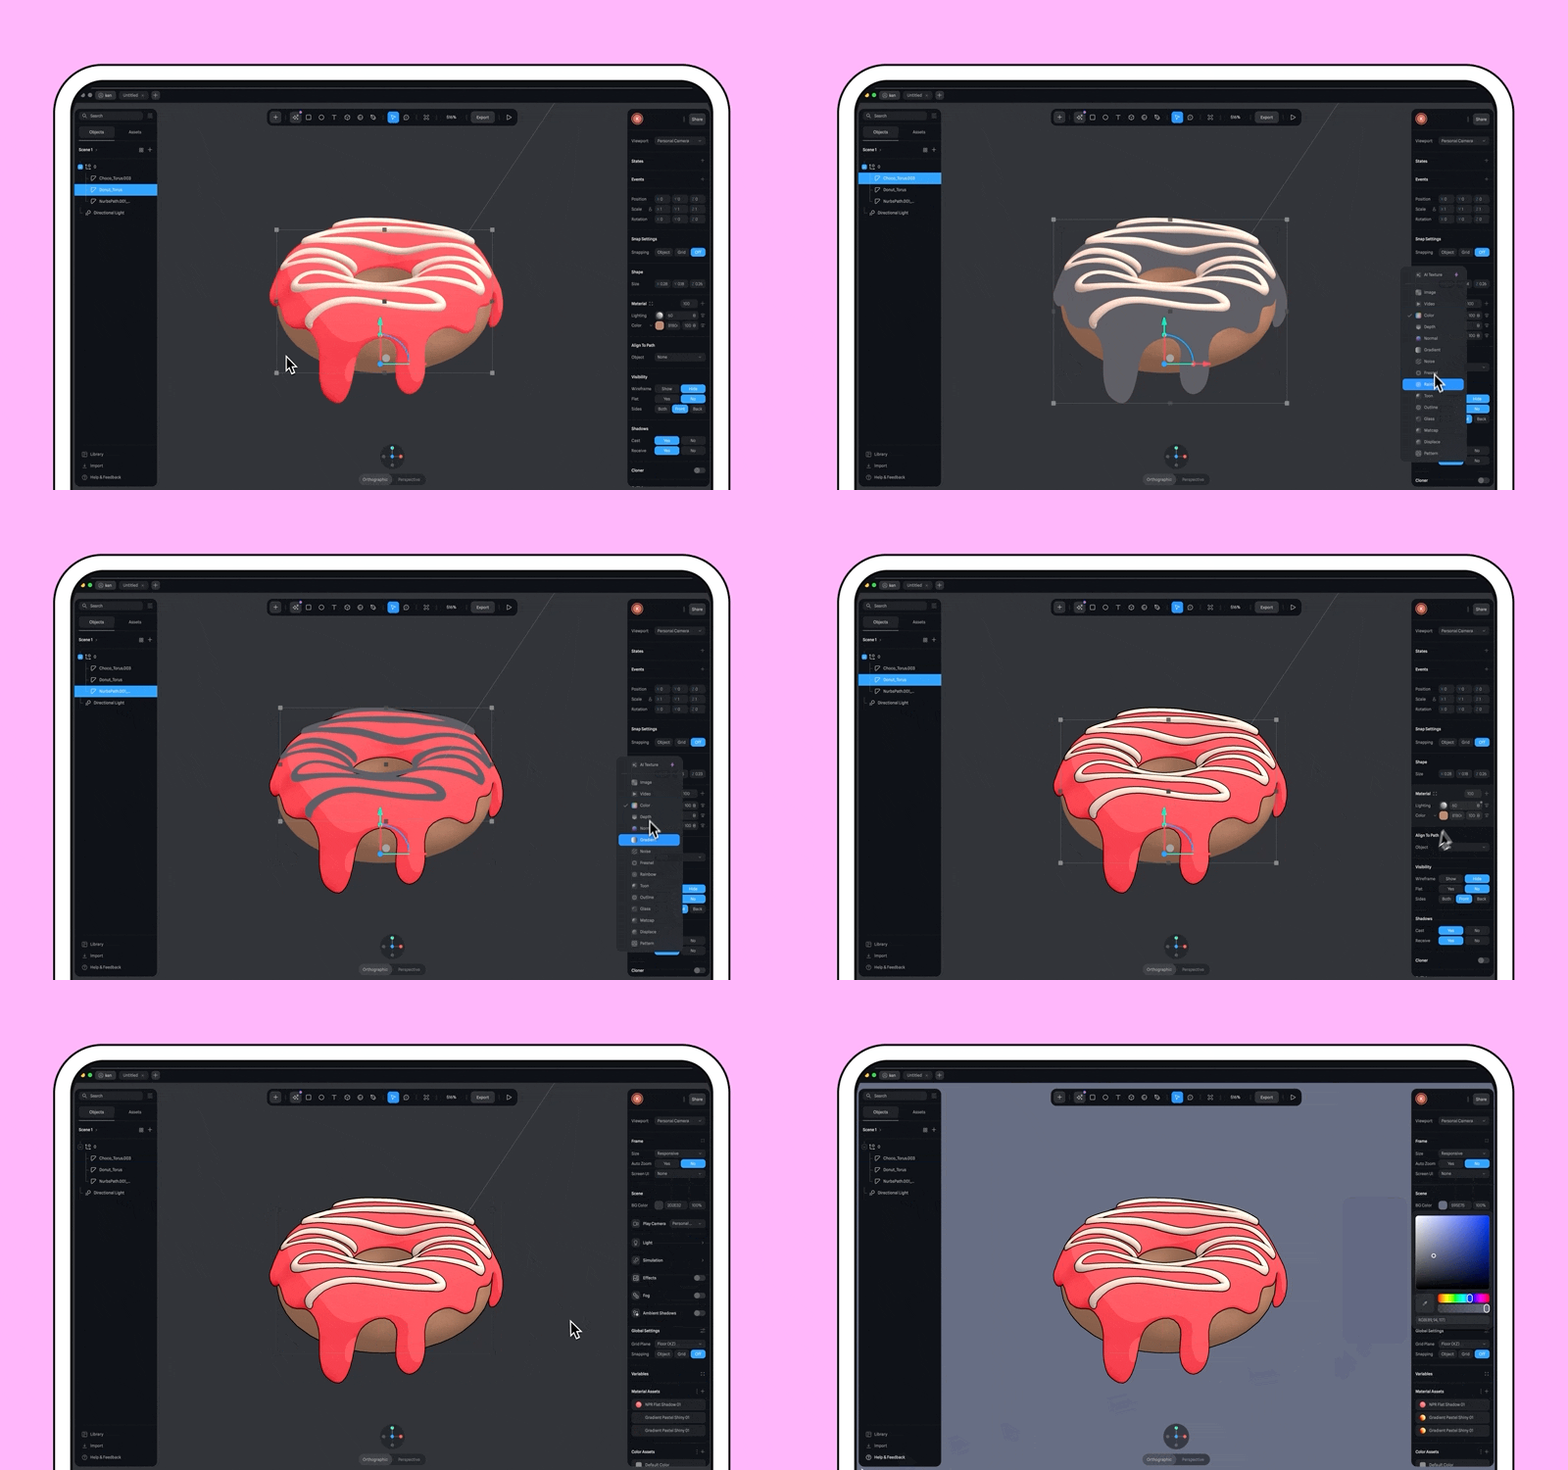
- Alternatively, you can always customize it based on your own preferences, adding materials, colors, images, effects like glow, outline and more.
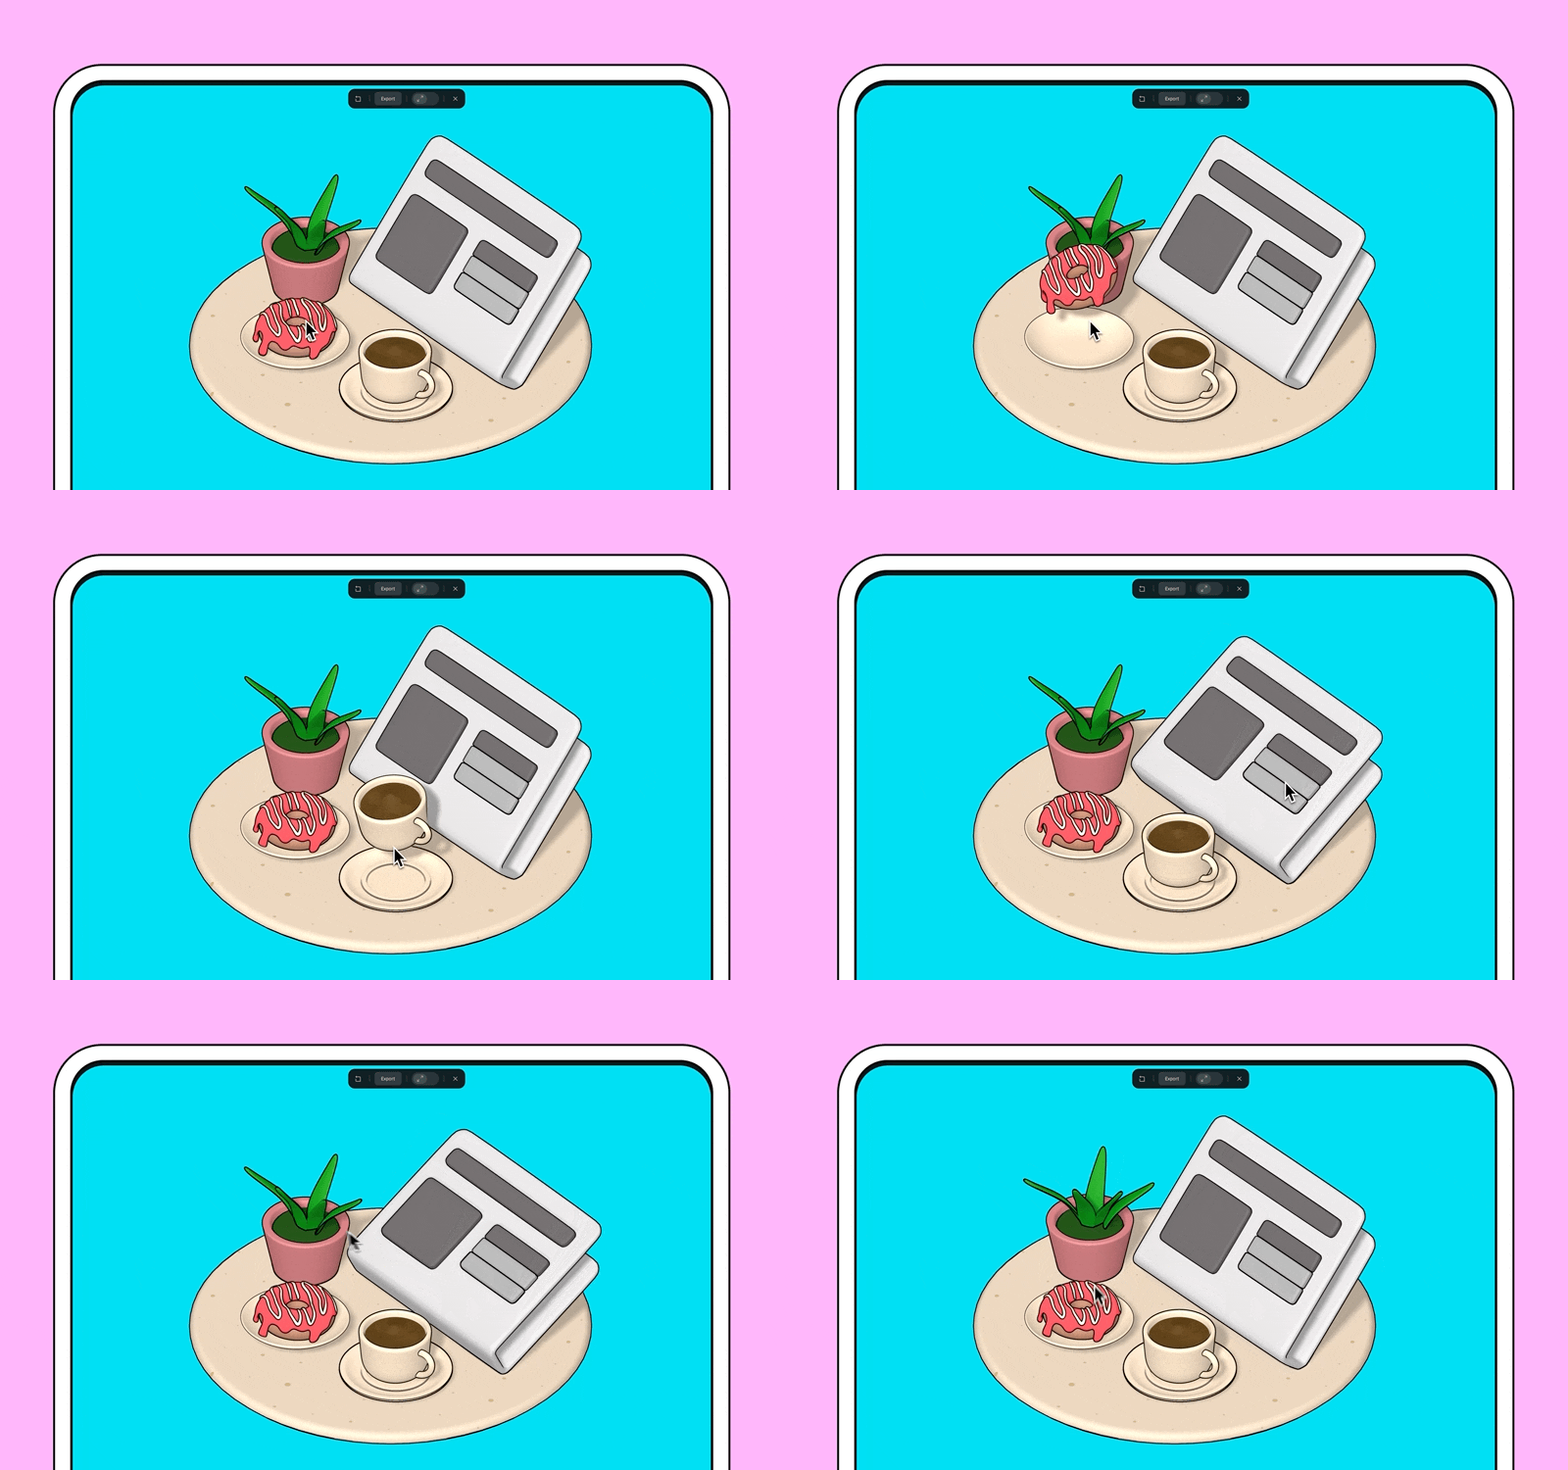
Adding Event actions to your 3D Spline
The Event setting on Spline can be used to trigger various actions to your 3D design object. This could be transitional-based actions where animation action and many other actions can be placed based on what you would like to trigger.
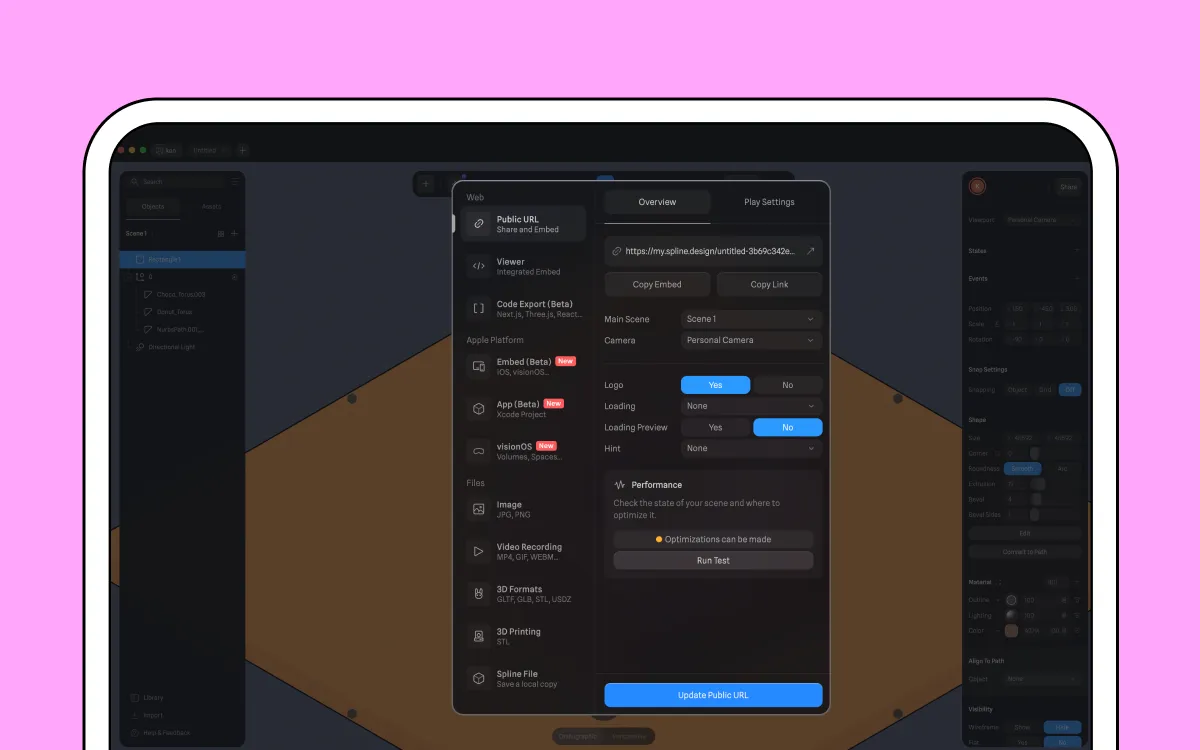
Export your 3D design
There are multiple way you can export on Spline, simple press Export and choose from any of the available options. Currently Spline do have export options for:
- Web: URL codes, codes, viewer
- Apply Platform specific export options: Embed code, App, visionOS
- Images: JPG, PNG
- Video formats: MP4, GIF, WebM and Image Sequence
- 3D formats: GLTF, GLB, and USDZ
- 3D printing: STL
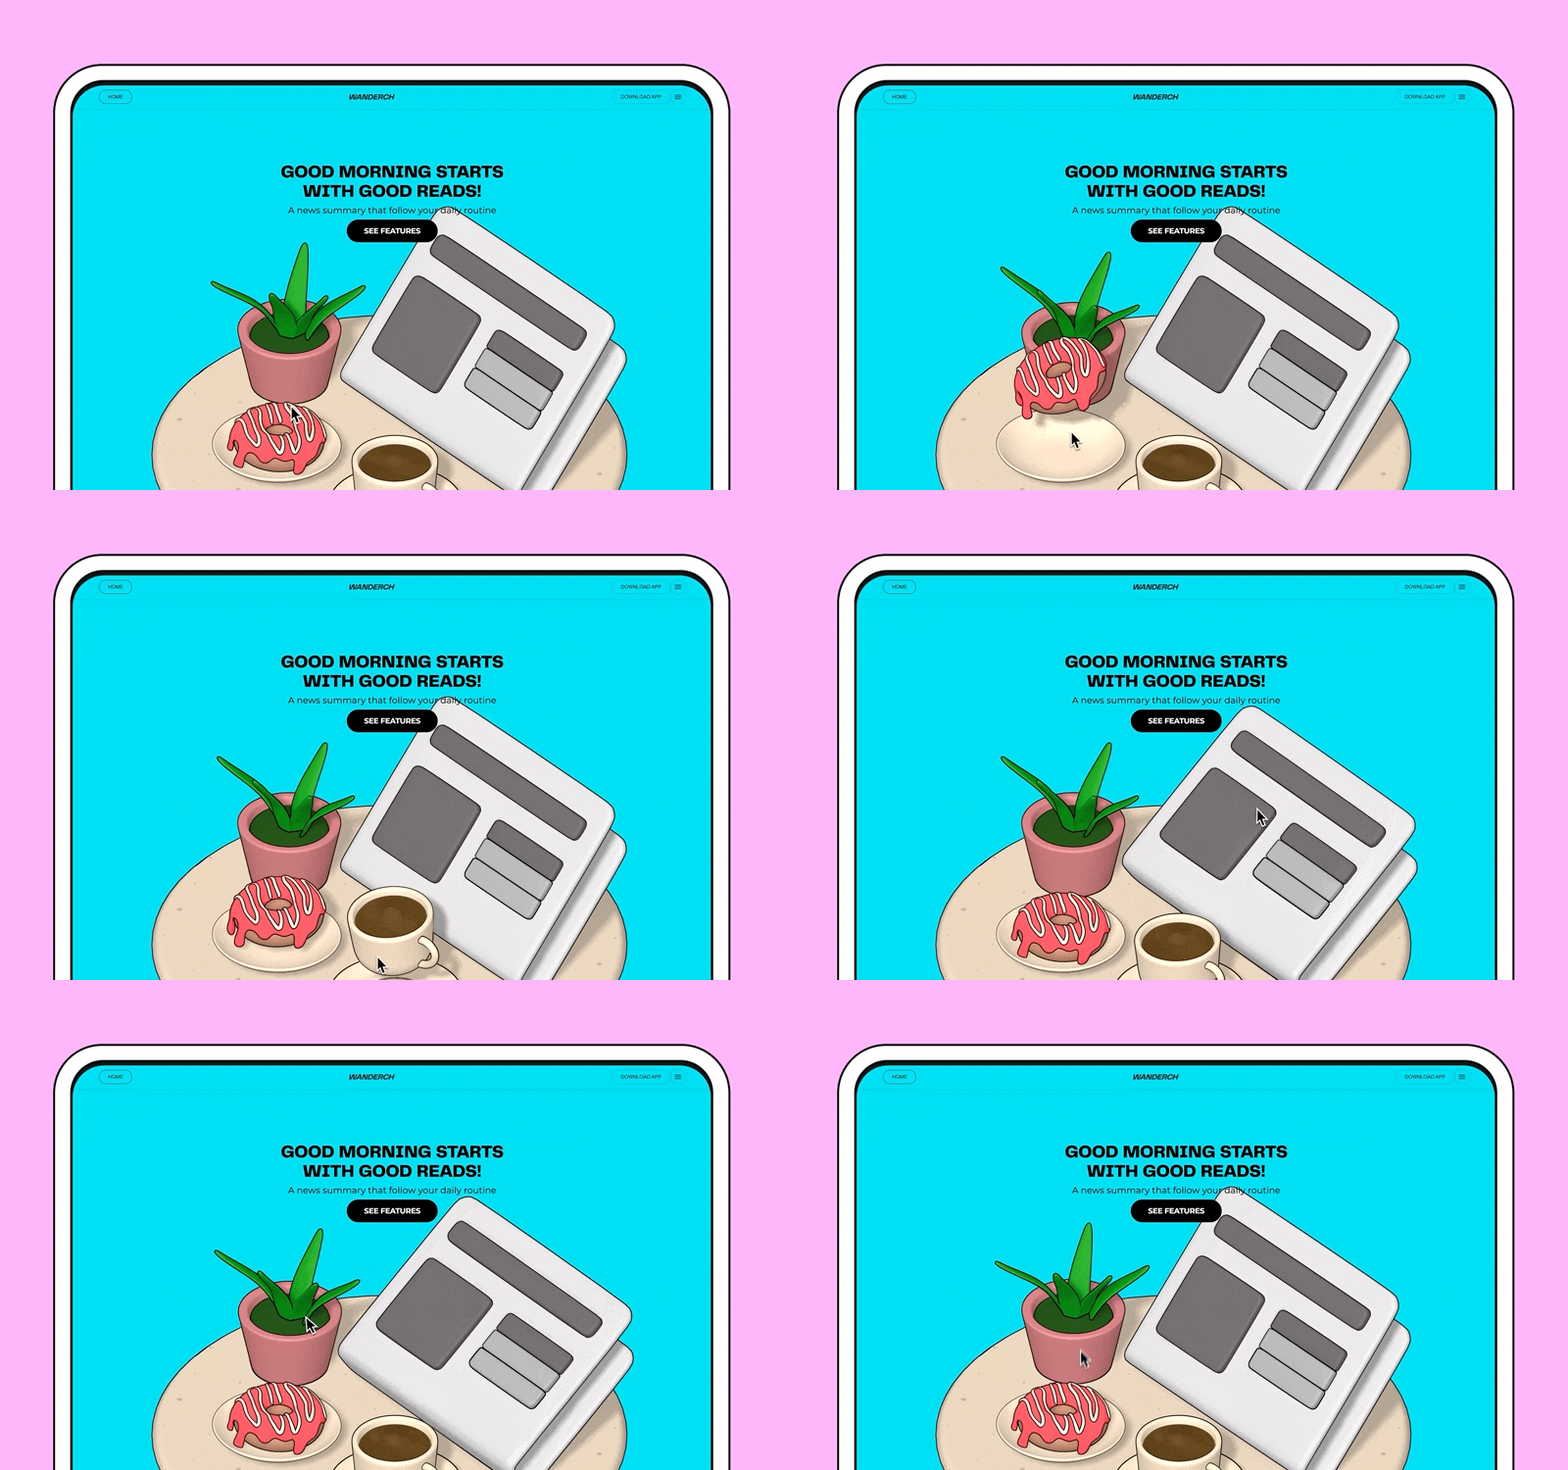
✨ BONUS: Integrate your 3D Spline animation to Webflow
Webflow, the no-code web creation, is a great place to integrate Spline.
- Go to your Webflow project add a Spline element from the panel under Media and add it to your container
- Select export and adjust the Player Setting based on your preference
- Copy the URL and paste it on Webflow
- You can also add trigger Interactions to your animation on Webflow from the left-side panel
Final thoughts
As you can see, adding 3D illustrations from IconScout to your Spline project and customizing is super, freeing up tons of valuable time for designers. This unlocks a whole new realm of design possibilities, empowering you to integrate these illustrations into your brand or design vision seamlessly.
Related Blogs


Iconscout on YouTube
Access the world's largest Design Ecosystem: Assets, Integrations, and Motion.


